The previous post was a review of the FD3 Triathlon Series as if it was a product. Below you will find a more detailed account of my personal experiences during the race. Let me know in the...
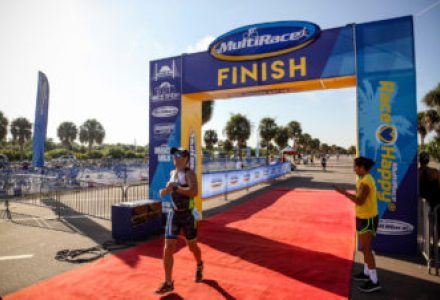

The previous post was a review of the FD3 Triathlon Series as if it was a product. Below you will find a more detailed account of my personal experiences during the race. Let me know in the...
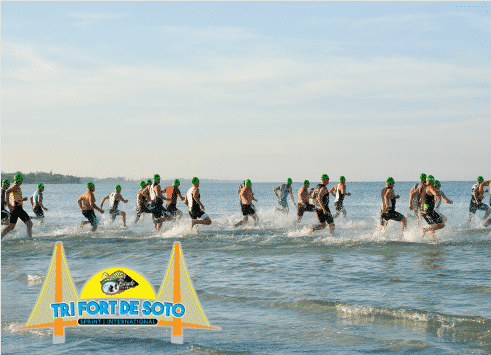
FD3 FLORIDA TRIATHLON INTRODUCTION The event company Multirace, holds numerous running and Florida triathlon events, and recently has planned an event in Habana, Cuba. The Multirace...
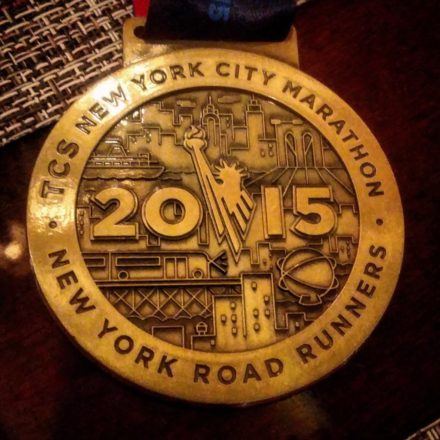
If you didn’t have an opportunity to read the epic writing in the previous post, I discussed the reason “why” I ran the NYC Marathon, then I highly recommend that you do. Not just because the...

My Why - PKD The human brain is an advanced computer that controls many different systems. The body is like a room full of servers each independently managing a different system with one major...
IRONMAN Maryland Part 1 I signed up for Ironman Maryland initially due to the reviews that said it was fast, and beautiful. Jaime started it with all the hype about it being a fast flat bike course...
Happy Hump Day! Workout Wednesday’s will consist of favorite workout of mine that I either have prescribed to my clients or have been assigned by MY Coach. It might also be a favorite of yours. ...
It has been a while, and I have a ton of ideas that I am anxiously awaiting to share with you. Unfortunately, time has been getting away from me. Between training myself, a full-time job and being at capacity with 15 individual clients I am struggling for time to post. I promise I will figure out a way to make time. I am so lucky to have such great people to bounce ideas off of, that sometimes, by not posting, I feel like I am letting all of you down, so I promise to post more even if the posts end up being a lot shorter than usual. (Which the length is probably not your favorite part of it anyway. I know I ramble.)
Before I get into the nitty-gritty of my personal opinion of compression, a disclaimer.
I am not a medical professional. The opinions that are shared on this post come from research, my own experiences and the experiences of athletes I have personally witnessed and information I have researched. Every athlete/person has a different body and some products and/or methodologies may be advantageous for some and may even be dangerous for others. This post deals with my beliefs and my research. (Was that clear?)
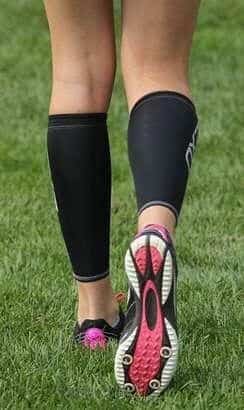
Lately, most of the questions from other athletes, including clients of mine, have asked about compression. This usually centers around calf sleeves, but does include some of the other compression apparel as well. My answer is usually, for recovery and for temporary use they are great, but not for training. Why? Great question.
I am going to use calf sleeves as my example.

While running, biking, swimming or any major activity using the legs, the muscles are constantly in motion. That motion is what naturally makes the muscles stronger. The muscle moves and is loaded with either more repetitions, or with weight. The full range of motion of each muscle is imperative to the strengthening of the muscle. Compression holds that muscle in place and limits the movement therefore limiting the range of motion. While compressed the muscle cannot fully develop while training. Let’s take a look at the anatomy of the lower leg in the running position.


As you can see the gastrocnemius muscle and Achilles tendon, when the knee is flexed, both constrict and then elongate when the knee straightens. Here is the epitome of the range of motion naturally occurring when running. The more flexion and constriction that take place the more they are stretched causing the breakdown of the fibers. After the recovery period the fibers wrap tighter and in more abundance aiding in a strength and endurance. Now imagine that gastrocnemius muscle remaining constricted due to a calf sleeve. It seems to me that this would dictate that it would not have full range of motion also causing the Achilles tendon to remain stretched without the full ability to absorb the impact. This could unintentionally damage the Achilles tendon, the gastronemius muscle and the soleus muscle. If not damage, it will limit the ability to be strengthened. This is why I personally do not recommend calf sleeves during training workouts.
Recovery
I do however do not mind wearing compression while in recovery to include immediately following the cool down of a workout. I mentioned the healing of the fibers earlier. In order for the fibers to heal and become stronger after the breakdown, blood must be pumped through the muscle and with it water for hydration. Compression does help to isolate that area helping to keep the majority of the blood and water being pumped through the body to the point of the compression. With the legs either elevated or even walking around and at that point limiting the movement, it would allow for the blood to pool in that area helping to re-hydrate the muscle thereby helping to heal faster. In turn, an occasional training run or race, with compression at the tail end of an injury, might also benefit, but in a very limited quantity, and duration.
–IronGoof
I believe I have started to write this post on injuries, a number of times, trying to be as clear as possible without seeming conceited or that the information I am giving is absolute. That being said I am giving this disclaimer:
The information in this post comes from experience, my personal research and conversations with Physical Therapists, Bio-mechanical experts, Orthopedists and other athletes. I am not a physician or medical expert, so please take this information as opinion based on cognitive research. Also, there is an exception to every rule and another explanation. I do welcome comments that give constructive criticism, but I make mention to this disclaimer first.
You might be surprised to hear that there are only two reasons runners (and other athletes) get injured; accidents and imbalance. Accidents are obvious right? For example; rolling the 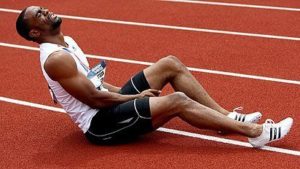 ankle stepping off a curb, falling, being hit by a bicycle, etc.
Imbalance will cover the why’s of the rest of the injuries. The human body is designed for every system to work in synergy, therefore when one piece of the puzzle is not operating a full capacity or efficiently, the other systems have to do more work. This is when the imbalance occurs.
When talking with Physical Therapists and Bio-mechanical experts I was shocked at some of the stories I heard. One story I heard was of a football player who was training, running 100s up and down the field carrying a ball. He had extended his shoulder just barely beyond its usual range of motion, and he ended up with severe pain in his opposite quadricep. “What?!!!!” was my initial reaction, however, I was then educated on the connective tissue (ligaments, tendons etc) which can be traced from the very top of our skull, down through our torso and into the extremities. Everything is connected.
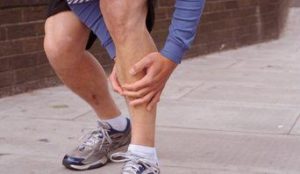
As another example, one of the most popular injuries for newer runners are the dreaded shin splints or medial tibial stress syndrome (MTSS).
Scientifically it is caused tiny micro tears of the fibers connecting the medial soleus fascia through the periosteum of the tibia where it inserts into the bone. Due to the soleus becoming so week that the constriction starts to bow the tibia. In more layman’s terms, the calf becomes so tight due to weakness and inflexibility, that the connective tissue pulls on the bone. (There is some physiological proof and complaints that more runners are getting shin splints and other injuries due to training in calf sleeves and other compression gear, but I will address this in another post.)
This same weakness, fatigue in the calf muscle can also cause another popular injury. Plantar Faciitis. In this case, instead of the connective tissue weakening through to the soleus is pulls on the plantar fascia causing inflammation which can be debilitating.
An injury can be traced either by the athlete themselves or by a professional to a point of imbalance. Most likely somewhere within the full spectrum of the athletes, body, behavior and, do I dear say it, attitude.
As a coach and trainer, my first rule, and one that I increasingly live by, is “Do no harm.” Therefore, I am always asking questions starting at a high level and continuing to get more specific. (The examples below are catered more toward running, but can be used in any sport.)
There are definitely more questions I ask, however, I think these examples give a good idea of why balance is so important.
The term “overuse” is being used quite a bit, but what is it? It’s an imbalance of planning or lacking thereof. Tracing Injuries is completed from the highest level which would be the training plan, all the way down to the balance of strength and flexibility within the connective tissue of the body. Personally, I think it is amazing that on one hand our bodies can endure a lot, but if we don’t notice those little weaknesses, it will create an imbalance that could cause and injury that may or may not keep us from doing what we love most.
Balanced Plan -> Period -> Weeks -> Workouts -> Balanced Form -> Body -> Mind
After a few seasons of the goal being just to finish those long races, most athletes decide not only would they like to finish the races comfortably, but hit those goal times. Is this where you are? In my opinion, in order to achieve faster times, comfortably, with little injury and pain, comes with a seasonal plan. This starts in the off-season with planning the race schedule and deciding, either with a coach or an experienced friend, what would be realistic. Obviously, moving from a 4 hour marathon to a 2:30 marathon in one season would be considered unrealistic for most runners, but is it possible to move to a 3:34? It could be based on the runner. It just takes a little longer of an approach.
Let me move to a quick history lesson to help put some of this into context. Arthur Lydiard was a running coach in New  Zealand whose method has won more Olympic medals and Marathon wins than any other coach in history. Of course, when talking about marathon wins and Olympic medals, coaches are not usually publicized, at least for running events. As a running and triathlon coach I personally identify with Arthur Lydiard as he himself was never an elite athlete but was an amazing coach. He just had a superior way of working with athletes and actually experimented all of his own methods on himself first. His biggest tribute is that he is considered the “Coach of Coaches of Champions.” Let me give you a few of his credits: Author of “Run to the Top”, “Run the Lydiard Way”, “Jogging the Lydiard”, “Distance Training for Young Athletes”, “Distance Training for Women Athletes” and “Distance Training for Masters”. His personal athletes include:
What is Periodization? Aruthur Lydiard was considered the father of periodization and his method contains the purest form. Periodization is a method of training which breaks down the season into smaller phases in a timely manner, so the athlete will be at peak performance at race time. Let’s face it, no matter how hard we try are bodies cannot be at peak performance 100% of the time. We can try, but most likely it will cause, injury or fatigue, but we can manage it so that our bodies are in the most superior physical condition when we need it most. Periodization provides for this, unfortunately, modern American coaching has bastardized periodization which may be the reason why we see more and more ITB, hamstring, Achilles and plantar injuries than every before. From here on is a high level explanation of pure periodization as Arthur would have coached and they way I coach now.
1) Aerobic or Base Phase – This phase starts in the off-season. It is running up to 100  miles a week at 1 to 2 minutes slower than race pace. This is strictly to build aerobic endurance. There are no intervals, no speed work, no tempo runs in this phase. Aerobic capacity can be increased and it will remain at that level as long as it is exercised. This is why an marathoner can take weeks to two months off and their first training session could be a half marathon. That aerobic base stays in tact and can be built upon. The first season an athlete can build his/her aerobic base to a 43 VO2 max and then the next season can build to a 60 VO2 max and the following season even higher. As long as the athlete isn’t off for years, or have a pulmonary injury, the aerobic base will remain constant. Usually, the Aerobic Phase will be from 10-16 weeks and compromise about 30% of the training cycle.
2) Hill or Strength Phase – This phase executes workouts that strengthen the core, hamstrings, quads, calves and increases flexibility. There are still no interval or speed workouts yet. The athlete will include 2-3 workouts of hills doing 30-60 minutes of bounding, striding and running up hills and doing cadence work down the hills. Long runs are also included to maintain and slightly increase the aerobic base. This phase lasts anywhere from 4-6 weeks.
3) Anaerobic Phase – Here is where intervals and speedwork are included in the training plan. Why do we wait this long? More injuries are caused by speedwork than in any other training, but when there is an adequate aerobic base and strengthening than the injury percentage drops significantly. While aerobic capacity can be built upon season after season, anaerobic or oxygen debt cannot. Every person/athlete has a capacity for oxygen debt that can be built to where a maximum is reached and it is impossible to gain any improvement. The improvement in speed will come from strength and aerobic capacity. Have you ever consistently done track or speed workouts and find that you cannot seem to get any faster? Or have you taken a break from interval training and when you returned you found that you were slower and it took a little while to return back to that faster pace? That is because you can only build your oxygen debt to capacity for so long and it depletes rapidly. Doesn’t it make sense to have a phase of intervals to build the oxygen debt and speed to its maximum right before race season? That was Arthur’s belief and mine as well. Anaerobic phase lasts 4-5 weeks.
4) Coordination phase – This phase incorporates all of the phases and simulation training after analyzing the weaknesses of the athletes. For instance if the athlete finds that he is losing speed at the end of the race the coach would plan a Progress Calibration Run(PRC) where the athlete would run a long warm-up and aerobic run to that point in the race and then run intervals to simulate how the runner would feel at that time in the race. The long aerobic run would always continue along with a day of intervals to keep up the anaerobic threshold. This phase would last for 2-4 weeks.
5) Taper Phase – Finally the race is around the corner and it is time to bring down the frequency, effort and duration of the workouts. The coach might put in a PRC run here or there and a long aerobic run, but basically this is just prior to the “A” race or race season beginning. This lasts 1-2 weeks
Once the season has started training would continue based on the athletes needs. The race season can continue until the Aerobic Capacity is depleted and then the off-season begins and the phases start all over again.
This method has both been proven to have less injuries, less muscle soreness and pain, and faster times and results. Give it a try one season. I suggest finding a coach that complies to a strict Lydiard approach and have them put a plan together for you. There is a lot more to this method than I can put together in one post as there are hundreds of books written on the Lydiard Method. Lydiard Coaches can be found on the Lydiard Foundation Website.
This post was originally written for IR4C.tv by the IronGoof himself. See it on the IR4C.tv website soon.
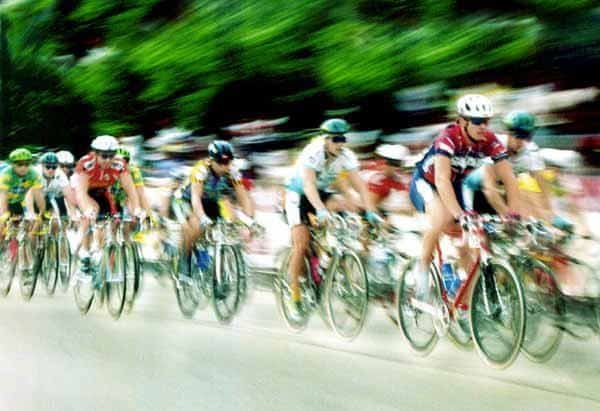
One of the scariest things for a beginning triathlete, besides getting in the open water, is cycling. The first image that wandered into my head upon deciding to start seriously bicycling was of a that scary peloton. Those tight formations of bikes moving at ridiculous speeds, during the Tour de France, so close together that one wrong move could cause serious damage to my body or someone else. Scary right? Luckily, triathlon doesn’t allow for huge groups like that, as a matter of fact it isn’t even allowed. Whew!
Buying my first Bike
I didn’t have a lot of money when I first started in triathlon, and I also didn’t really know if I was going to like it. I spent a lot of time in bike stores drooling over the expensive bikes, while studying cheaper entry level bikes. Every bike store had a different angle they played. One would say, purchase the more expensive bike, gain more speed so when I improved I didn’t have to buy another bike. Another would tell me to buy the entry level but load it up with expensive components so I could ride faster, and when I wanted another bike, the components alone would warrant a good price, and of course that store would buy it back from me and give me a discount an another bike. Decisions, decisions what to do, what to do?
I researched different road and tri bikes online and in magazines, and while I was pretty sure I would enjoy triathlon, I decided on an entry level Canondale CAAD 9 road bike. I also included in my purchase, a pair of pedals, cleats, shoes and a helmet. The helmet was very important especially since I hadn’t actually rode a bike in over 10 years. Would I really not forget how to ride a bike? The answer to that my friends is YES. It is not a skill that is forgotten. It maybe a little unsteady the first couple of times, but not forgotten. Luckily I will have my trusty helmet, just in case.
I also read something that resonated with me. The most important thing that is needed after the purchase of a bike, is the fitting. At first I thought, “what? Don’t I just have to find the most comfortable height of the seat and then get going?” I had no idea that there are so many different adjustments on a bike, to a point that bike “fitters” actually have to be certified in order to properly fit you. They have to take courses, pass tests and be mentored. “Really?”, you ask? Yes…really.
The fitting took about an hour where they put my bike on a trainer, and with my shoes and bike shorts I pedaled, then the fitter took measurements and made adjustments to my seat post raising it and lowering it to a perfect dimension. Then he took angle measurements from the ground to my hip, knee and shoulder and from the pedal and a bunch of other places. He moved my saddle not only up and down by forward and back. He then took my handle bars and put different size spacers on the tube underneath my handlebars to find the perfect height and then was able to move them back and forth to find the right angle, height and most comfortable spot for me. I had no clue there was this much to it.
Pre-First Ride
As I left the store after my fitting, Jo-el, the general manager and friend from my track club, gave me some good advice. I had never rode in cleats and pedals before, where my feet were clipped into the pedals where they wouldn’t just simply lift up. I had to turn my heel so the cleat would unclip from the pedals so I could put my foot down. Jo-el said to take my bike in the house and put it between a doorway, and practice clipping and un-clipping from the pedals. Also, I needed to find the most comfortable side to unclip first and then stick to that side no matter what. I followed that advice in detail. I clipped, unclipped, clipped and unclipped till I was sure I had mastered it. Then I took a little ride around the block and practiced even more till I was confident I mastered at least that part.
I had a feeling of euphoria that first little trip in my neighborhood. I felt fast, free traveling under my own power on this brand new, tuned Cannondale bike. I was really excited for my first ride the next day in the hills of San Antonio.
The First Ride
I drove to San Antonio…Florida that is, with my brand new bike in the back, my new bike shorts on, bottles ready to put in their cages on the bike, coffee in my cup holder and classic rock playing on the radio. I remember having mixed feelings about this initial ride. I had never ridden in a group before, I had never ridden with these cleats and clips before, but I knew I was in good shape but was I fit enough? After that I just thought to myself, “if you cannot go as far then just turn around and head back. no big deal.”.
I met a friend at these ball fields and was mesmerized by the amount of bikers getting ready to take their morning ride. The sea of colors from the different bikes and jerseys was extremely overwhelming. That anxious feeling came back for a second until my friend mentioned we were riding with triathletes not pure cyclists. They would understand I was on my first ride and would help me out. After preparing for my first journey, we found our formation and began the trek.
I was surprised that I was staying in the middle of the pack and with minimal effort. The wind was in my face, I was pedaling under my own power and keeping up! It was an incredibly euphoric feeling. Unfortunately, when we hit the first long hill, euphoria turned to anxiety and then… embarrassment.
My pedaling slowed, and it became extremely hard to mash down on the pedals. With very minimal spinning of my legs I tried to switch to higher gear, but I actually ended up in a lower gear which made it even harder. When I did finally gear up, it was too late. I couldn’t move the pedals fast enough to switch gears, and my chain fell off , so I was at a dead stop. Of course I was so concerned about the gears I didn’t unclip out of my pedals, and I went down on my side. The only thing that really hurt was my ego as I stood my bike up and examined the chain. The group was passing me all asking if I was ok, and taking for granted that I was telling them I was fine and to keep going. By the time I had my chain back on the group was completely out of site. I pedaled like a bat out of hell hoping to catch up, but I missed a turn and ended up 10 miles out of my way, and lost.
To make a long story short ( I know, too late) one of the faster members of the group realized I was gone, backtracked, and finally found me asking directions at a convenience store. He led me back to the group and I finished the ride without any other issues, but I learned a lot of lessons that day.
Hints to get started in cycling straight from the Goof:
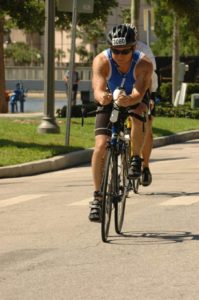
On my first bike after a couple of modifications
1. Buy an entry level road bike. This is usually an aluminum alloy frame. You don’t want a Wal-mart special, but you don’t need to start with the top of the line bike either.
2. Purchase a set of entry level pedals, cleats and shoes. The pedals usually come with the cleats and the bike shop will install them for you.
3. Purchase safety equipment. Biking shorts, and a helmet to start. I would also have a set of sunglasses as well. Not just to keep the sun out of your eyes, but it helps with the wind too. Make sure you also have at least one water bottle with a cage installed on your bike.
4. Get the bike fit for you. Have a certified bike fitter make those adjustments specifically for you.
5. Practice getting in and out of your cleats . Put your bike in a doorway, hold onto the frame and get in and get out of your cleats. Find the most comfortable side of the bike and then practice getting out of the cleats and putting your foot on the ground.
6. Take a short ride around your neighborhood and continue to practice getting in and out of your cleats. When seeing a stop or even a potential stop ahead practice just moving your heel just to the point where you unclip before stopping so you have a quick option that you can pull out of your clip to stop or return your heel to clip back in to keep going. Remember to always clip out and stand with the same foot first every time.
7. Understand your gears. While in that first ride, switch the gears on your right hand and find what lever takes you to a higher or easier gear, and which one brings you to a lower or harder gear.
8. Take your first long ride with friends and have some fun.
One last thing, you are going to fall. That is just the reality of it. You will get stuck in your cleats at some point and you will fall over, but it will be minimal. The trick is to accept it, get up brush yourself off, laugh at yourself, get back on your bike and have fun. It’s worth it I promise.
Easy Exercises to Keep You Active
Of course, you know you should eat right and exercise. Most everyone understands the importance of fitness for health. Why is it so hard to stay motivated then? Consider the things that inspire you toward fitness. You may enjoy a particular healthy recipe or be a fan of a certain professional athlete. You might have a goal of running a race or participating in a certain sporting event.
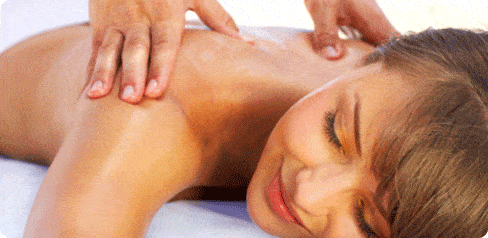
The primary benefit of sports massage is to improve blood to the muscles. Sports massage is a highly effective healing technique also moves oxygen and nutrients to muscles. After you exercise, lactic acid builds up in the muscles. Sports massage can eliminate lactic acid buildup. You can decrease your recovery time by simply eliminating lactic acid buildup and improving the flow of lymphatic fluids. This process promotes the healing process (http://www.howtobefit.com/massage-for-runners.htm).
Consider these tips and methods of sports massage from the Pro academy of New York golf course, Shenandoah:
Frozen Water Bottle – Most athletes are familiar with the concept of rest, ice, compression and 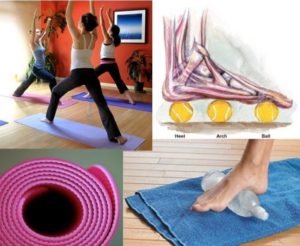 elevation (RICE). A frozen water bottle is an affordable way to ice the muscles and massage them at the same time. The ice will reduce the swelling and soothe your extremities as you roll your muscle with the water bottle. Consider this low-cost at-home massage remedy after your workout.
Tennis Ball – If you don’t need the ice, try a tennis ball to massage your muscles. Tennis balls can also be used on the back and legs also. This method is effective for working out the knots in the foot. You can roll the feet over the tennis ball from toe to heel for the most effective results.
Soup Cans – Soup cans are also used to massage the feet and legs. Consider rolling your feet over cans or rolling the cans over your legs to relieve tension and pain. As the pain dissipates from the area of the body
where the soup cans are applied, recovery will begin. This will prepare you for your next workout session.
PVC Pipe – this is an inexpensive alternative to foam rollers. 10″ pipe is best and it is easy obtained from your local Home Depot or Loews. If a little cushion is needed the pipe can be wrapped in several layers of contact paper and secured with duct tape. You can then use it to massage your calves, hamstrings and even you lower and upper back just by rolling on it. It will easily break up the toxins that are located within the muscle and allow them to pass through the membrane and out through the endocrine system.
Training is Better With Sports Massage
There is nothing better than a nice sports massage to start the healing process. Most athletes have made the massage a part of marathon training. Certainly, the benefits of these massages have been proven. Consider sports massage for less painful and more effective training. A healthy life is easy with simple changes. Take baby steps. Remember that moderation is key in all things. Indulge from time to time, but treat the body as the precious temple that it is. When setting your health goal start small. Choose a goal
that is attainable and reasonable.
(This was written by Michelle Pino with some added content by the IronGoof specifically for IronGoof.Com)